

Do you want to add footnotes to your WordPress blog posts?
If you are writing an article that references research or contains a lot of complex information, then you may want to use footnotes in your content. These are little numbered marks in a text that provide additional context to a sentence or paragraph.
In this article, we will show you how to add simple and elegant footnotes to your WordPress blog posts, step by step.
If you run an educational blog, publish research, or cover news stories, then footnotes are a great way to give more context to your content. You can use them to add comments, highlight important facts, or insert citations to academic sources on your website.
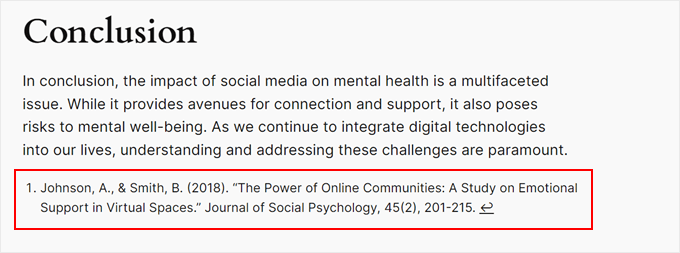
A footnote typically appears as a small, superscript number within the main body of your text. The actual footnote content is then placed at the bottom of the page or appears as a tooltip to distinguish it from the main content.
Here is an example:
Besides providing clarity and transparency for your readers, footnotes can make your WordPress website look more professional and trustworthy. They show that you have done your research and have the sources to support your claims.
The WordPress.org editor now has a built-in footnote feature that you can easily use to insert additional context.
This guide will show you how to add WordPress footnotes to your blog posts or pages using two methods. One is with using the Footnotes block in the Gutenberg editor, and the other is with a plugin.
You can use the links below to jump to a specific method:
This method is best for people who want to use simple footnotes and don’t want to install a plugin for this purpose.
To use the WordPress Footnotes block, you will need to open the Gutenberg block editor for a new or existing post or page.
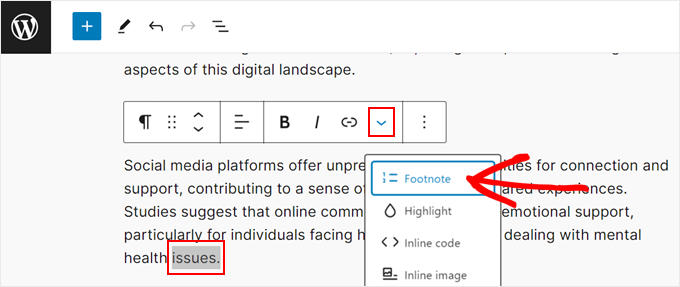
After that, just highlight a word in your content that you want to add the footnote to. In the block toolbar, click the dropdown arrow and select ‘Footnote.’
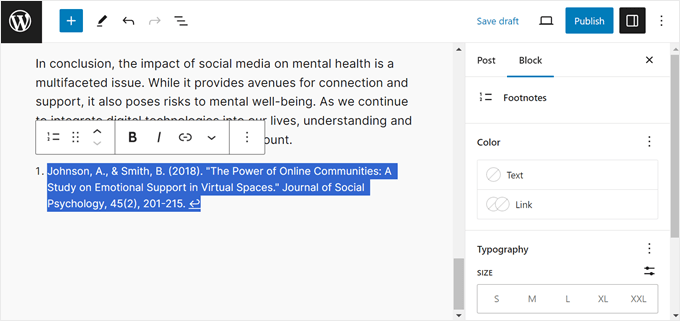
You will now be redirected to the bottom of the page, where the Footnotes block has been added automatically. Here, you can type in your extra information.
Additionally, you can customize the block’s color, typography, dimensions, and border using the settings in the right-hand panel.
Feel free to repeat this step to include as many footnotes as needed.
When you preview your WordPress site, there should be a footnote link to the sentence you highlighted earlier.
If you click on the hyperlink, it will bring you to the bottom of the page with the footnote.
Here, you can also click the hyperlinked arrow to go back to the section where the footnote is assigned.
While this method is fairly simple for beginners, it doesn’t offer tons of customization options. If you are looking for more ways to change the footnote appearance, then just continue to the next method.
Another method of creating footnotes is to use the free Modern Footnotes plugin. Unlike the Footnotes block, it offers a lot more options to modify the footnote appearance.
For example, you can make the footnote appear as a tooltip, as well as extra information at the bottom of the page.
The first thing you will do is install the Modern Footnotes plugin. For more information about plugin installation, check out our guide on how to install a WordPress plugin.
Configuring the Modern Footnotes Plugin Settings
With the plugin installed, you can now go to Settings » Modern Footnotes. This is where you can configure the footnote settings to your preferences.
Let’s go through each setting one by one.
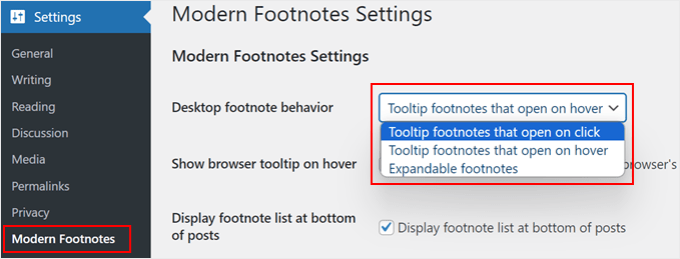
‘Desktop footnote behavior’ lets you select how the footnote should behave when the website is being viewed on a desktop computer.
You can make the footnote appear when a cursor hovers over the tooltip or when the user clicks on the tooltip. Alternatively, the footnote can expand below the footnoted text.


